
Installation Guidance Included With Every DIY Supply Purchase
Installation guidance is included with every DIY synthetic grass supply purchase — and it’s the part that genuinely separates a local specialist supplier from an online retailer who ships a roll of turf and disappears the moment payment clears.
Every DIY buyer walks away with step-by-step installation advice covering the full sequence of the job, from initial ground clearing through to final pile brushing. Base preparation requirements are explained in detail for the specific site conditions, including the right aggregate depth, compaction technique, and grading approach for the project. Joining and cutting techniques are demonstrated using actual turf samples, so the method is clear before any cuts are made on the real product. Infill application rates and brushing sequences are covered, along with edge finishing options for the perimeter detail.
Printed installation guides are available to take home for reference during the job, and in-store advice sessions are available for buyers who want to walk through the project plan in person before getting started. Phone support is available throughout the installation for any questions that come up mid-project, which is when most DIY questions actually arise.

Choosing the Right Synthetic Turf Product for Your Project
Pile Height and Density Considerations
Pile height refers to how tall the synthetic blades stand and ranges roughly from 30mm to 45mm for residential applications. Shorter piles around 30mm to 35mm hold their shape better under heavy foot traffic, making them ideal for high-use areas. Taller piles around 40mm to 45mm deliver a lusher, more natural look for ornamental lawns. Density determines how full the turf feels and directly affects durability.
Drainage Rating and Site Conditions
Drainage rating measures how quickly water passes through the turf backing and matters enormously on the Central Coast where summer downpours come in heavy bursts. Standard backings drain at around 30 litres per square metre per minute, while fully permeable options handle far more. Sloped sites, shaded areas that stay damp, and pool surrounds all call for higher drainage ratings to prevent water pooling on the surface.
Pet-Friendly and Soft Fall Product Options
Pet-friendly turf products feature fully permeable backings, antimicrobial yarn treatments, and shorter pile heights that allow easy cleaning and quick drainage. Soft fall turf is engineered with a shock pad underlay system to meet Australian playground impact standards, making it the right choice for play areas under swings, trampolines and climbing frames. The right specialty product turns a good lawn into the right lawn.
How to Measure Your Area and Calculate Material Quantities
Accurate measurement is what stops a DIY project from running short of turf halfway through the install or leaving hundreds of dollars of unused material in the shed. Measuring properly takes ten minutes and pays for itself many times over.
Start by sketching the area on paper and breaking irregular shapes into simple rectangles. Measure each rectangle in metres, length by width, and add the figures together to get the total square metres. For curved or odd-shaped areas, measure the longest length and widest width of the section and treat it as a rectangle — synthetic turf comes in rolls and is cut to fit, so the offcuts account for the curves.
Add ten per cent to the total square metre figure to cover joins, trimming and waste. Synthetic turf rolls come in standard widths, usually 3.7m or 4m, so factor roll width into the layout to minimise seams. Base aggregate is calculated separately by cubic metres, and infill by kilograms per square metre.
Complete DIY Synthetic Grass Supply Package for Central Coast Homeowners
A complete DIY synthetic grass supply package includes everything needed to finish the job properly — not just a roll of turf dropped on the driveway with a wave goodbye. Central Coast homeowners working through a DIY installation can source the full system from one local supplier, which keeps the project simple and the components properly matched to one another.
A full DIY supply package covers:
- Synthetic turf product specified to suit the application, foot traffic and aesthetic
- Weed barrier geotextile to prevent regrowth beneath the lawn
- Base aggregate guidance for the correct crushed rock and sand mix
- Shock pad underlay where soft fall or extra cushioning is required
- Joining tape and adhesive for invisible, secure seams
- Infill product in the right type and quantity for the chosen turf
- Edging and fixing materials, including galvanised nails, pegs or timber edging
- Specialty components, such as drainage cells or pet-specific deodorisers, where the project calls for them
Everything supplied. Everything compatible. Everything available locally.
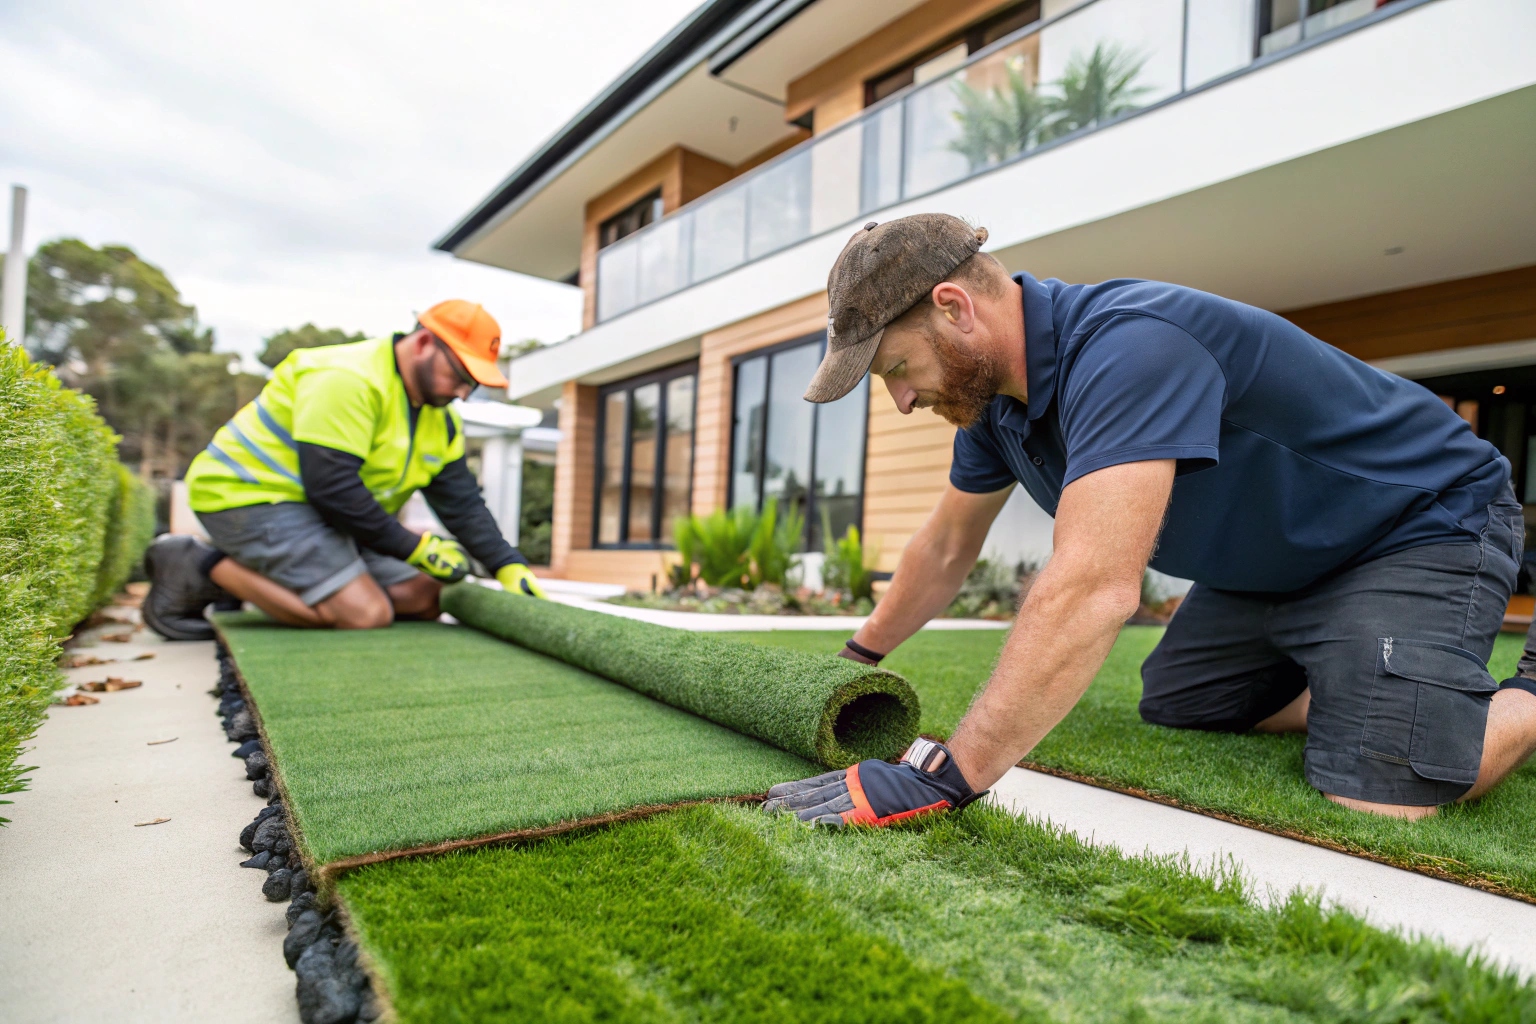
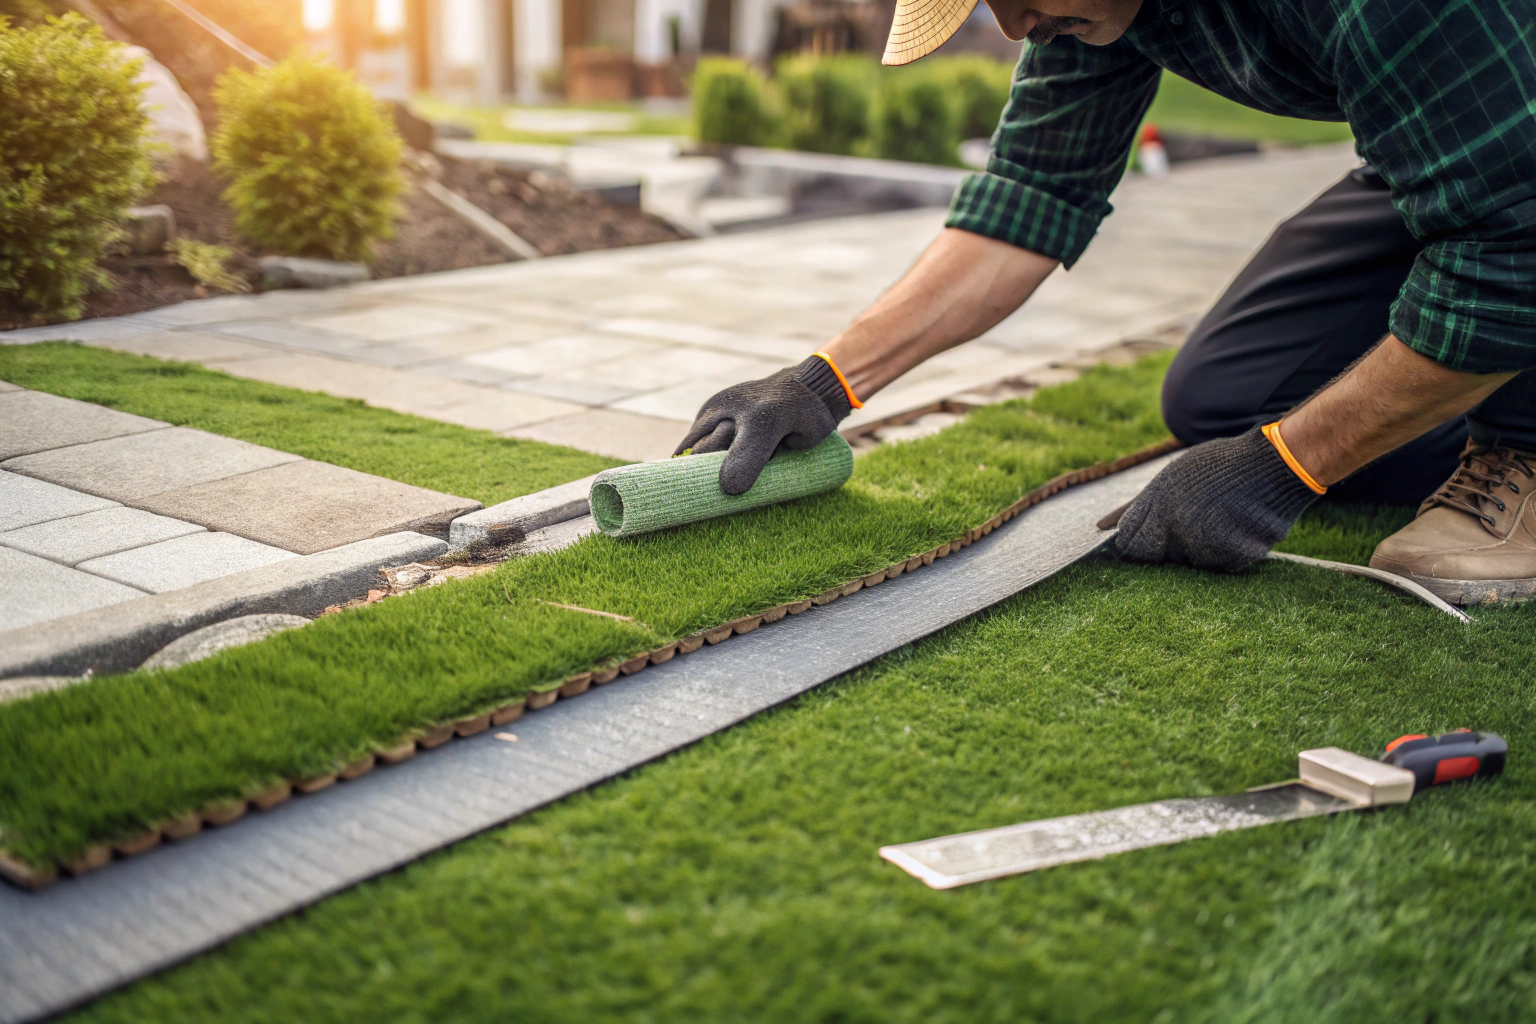
Joining, Cutting and Seaming Synthetic Turf the Right Way
Joining and seaming is where a DIY synthetic grass installation either looks professional or gives itself away from across the yard. The good news is the technique is straightforward once the basics are understood, and the right materials make all the difference.
Pile direction is the first rule — every piece of turf laid must have the pile running in the same direction across every join. Mixing pile direction creates a visible line that catches the light from one angle and ruins an otherwise tidy installation. Roll the turf out, check the pile lies with a hand, and orient every panel the same way before any cutting begins.
Cutting is done from the backing side using a sharp utility knife with fresh blades, slicing between the stitch rows for a clean edge. Join the panels by butting the edges tightly together over joining tape, applying adhesive evenly, and pressing the turf down firmly with weight along the seam until set.
Infill Application Techniques for Durability and Performance
Infill is the unsung hero of a synthetic grass installation. Done properly, it weighs the turf down, holds the pile upright, protects the backing from UV damage and gives the lawn that springy underfoot feel. Skip it or skimp on it, and the turf goes flat, shifts at the edges and wears out years earlier than it should.
Key infill application techniques for a successful DIY install:
- Choose the right infill type — silica sand for general residential lawns, coated antimicrobial sand for pet areas, and rubber crumb for soft fall and high-impact zones
- Calculate the correct quantity — typical application rates run between 5kg and 8kg per square metre, depending on pile height and product specification
- Apply in even layers using a drop spreader or by hand, working across the lawn in a methodical pattern
- Brush the infill down into the pile with a stiff broom or power broom, lifting the blades and settling the granules to the base
- Top up after settling, following the first few weeks of use
Frequently Asked Questions
A standard residential installation of 30 to 50 square metres takes a capable DIY homeowner around two weekends — one for base preparation and excavation, and one for turf laying, joining, edging and infill application.
Quality synthetic turf installed over a correctly prepared base typically lasts 15 to 20 years. Cheaper products or poor base preparation can cut that lifespan down to as little as five years.
Most Central Coast homeowners save between 40 and 60 percent on total project cost by handling installation labour themselves. Savings depend on area size, site complexity, and whether base materials need to be hired in.
Yes. Hard surface installations require a shock pad underlay for comfort and drainage, with the turf glued or weighted around the perimeter rather than pinned with nails. Drainage must be confirmed before laying begins.
A quick hose down every few weeks, occasional brushing to lift the pile, and removing leaf litter is generally all that’s needed. Pet areas benefit from a rinse with diluted enzyme cleaner every month or so.
Short pile sits 20mm to 30mm and gives a manicured, putting-green finish ideal for high-traffic and commercial areas. Long pile sits 35mm to 45mm and replicates natural lawn with softer underfoot comfort.
Get a Complete DIY Synthetic Grass Supply Quote on the Central Coast
Get a complete DIY synthetic grass supply quote and walk into the project knowing exactly what’s needed, what it costs, and how to install it properly. Central Coast homeowners are welcome to come in, view the full range of turf samples in person, feel the difference between products, and work through the specifications with someone who installs this stuff for a living.
Bring rough measurements of the area, a few photos of the site if handy, and any questions about the project. A complete supply quote covering turf, base materials, infill, edging and all system components will be put together on the spot, along with the installation guidance needed to get a great result the first time.